
Create a sendout
Sendouts lets you to contact a patient to gather more information before an appointment or send e.g. test results, a questionnaire or self assessment scale before a scheduled appointment.
If you are new to using Sendouts, learn about the feature in Get started with Sendouts.
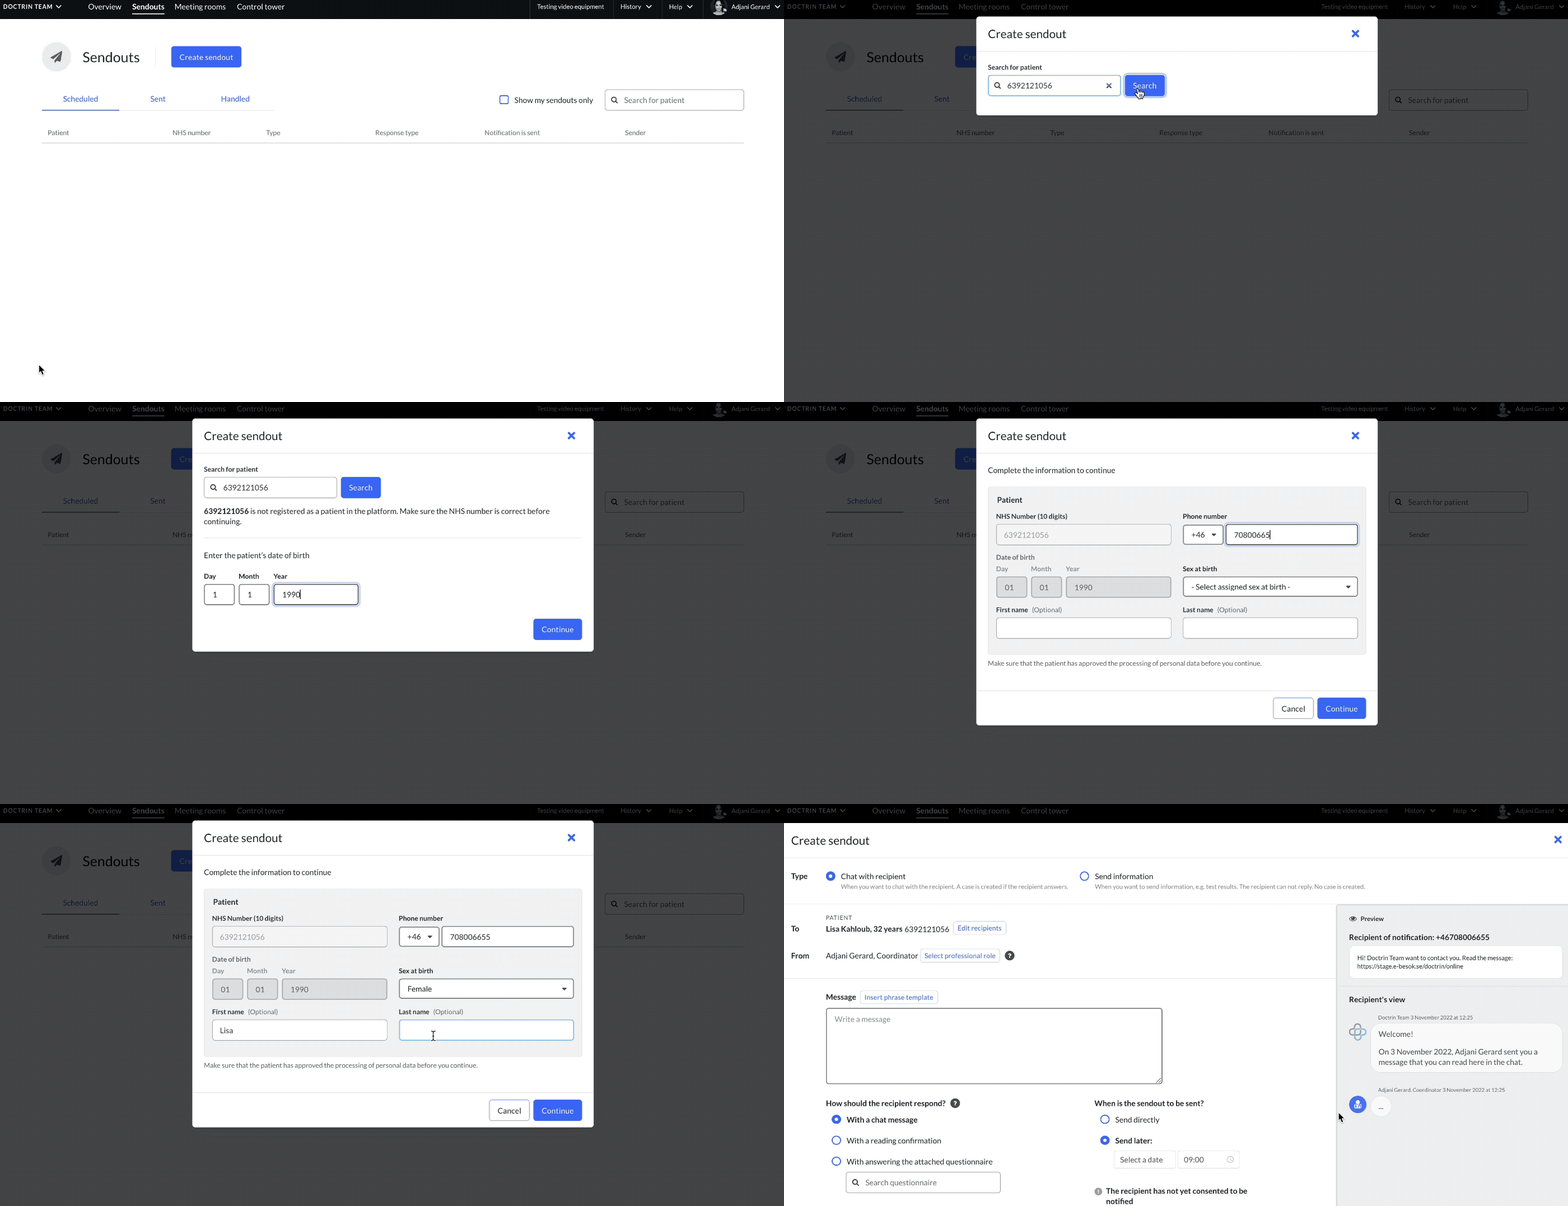
How to start creating a Sendout – search and choose a patient
There are two ways to start creating a Sendout to a patient. Either from the case view, select “Create Sendout” in the tool panel, or from the main menu.
- Go to the main menu for your unit.
- Select “Sendouts”.
- Select “Create Sendout”.
- Enter an unique identifier to search for the patient. Depending on the settings for a unit this is either e.g SSN, NHS number, Member ID. Two things can now happen:
Result
How you continue
The patient is already registered in the platform
The patient’s information is shown and you can select them to contine to the next step.
The patient is not registered in the platform
You will be asked to complete additional information and then add the patient to the platform.
Note: If age is not automatically retrieved from the unique identifier (i.e. age is automatically calculated from certain identifiers, such as social security number, national identifier), you need to enter the patient’s date of birth to continue.
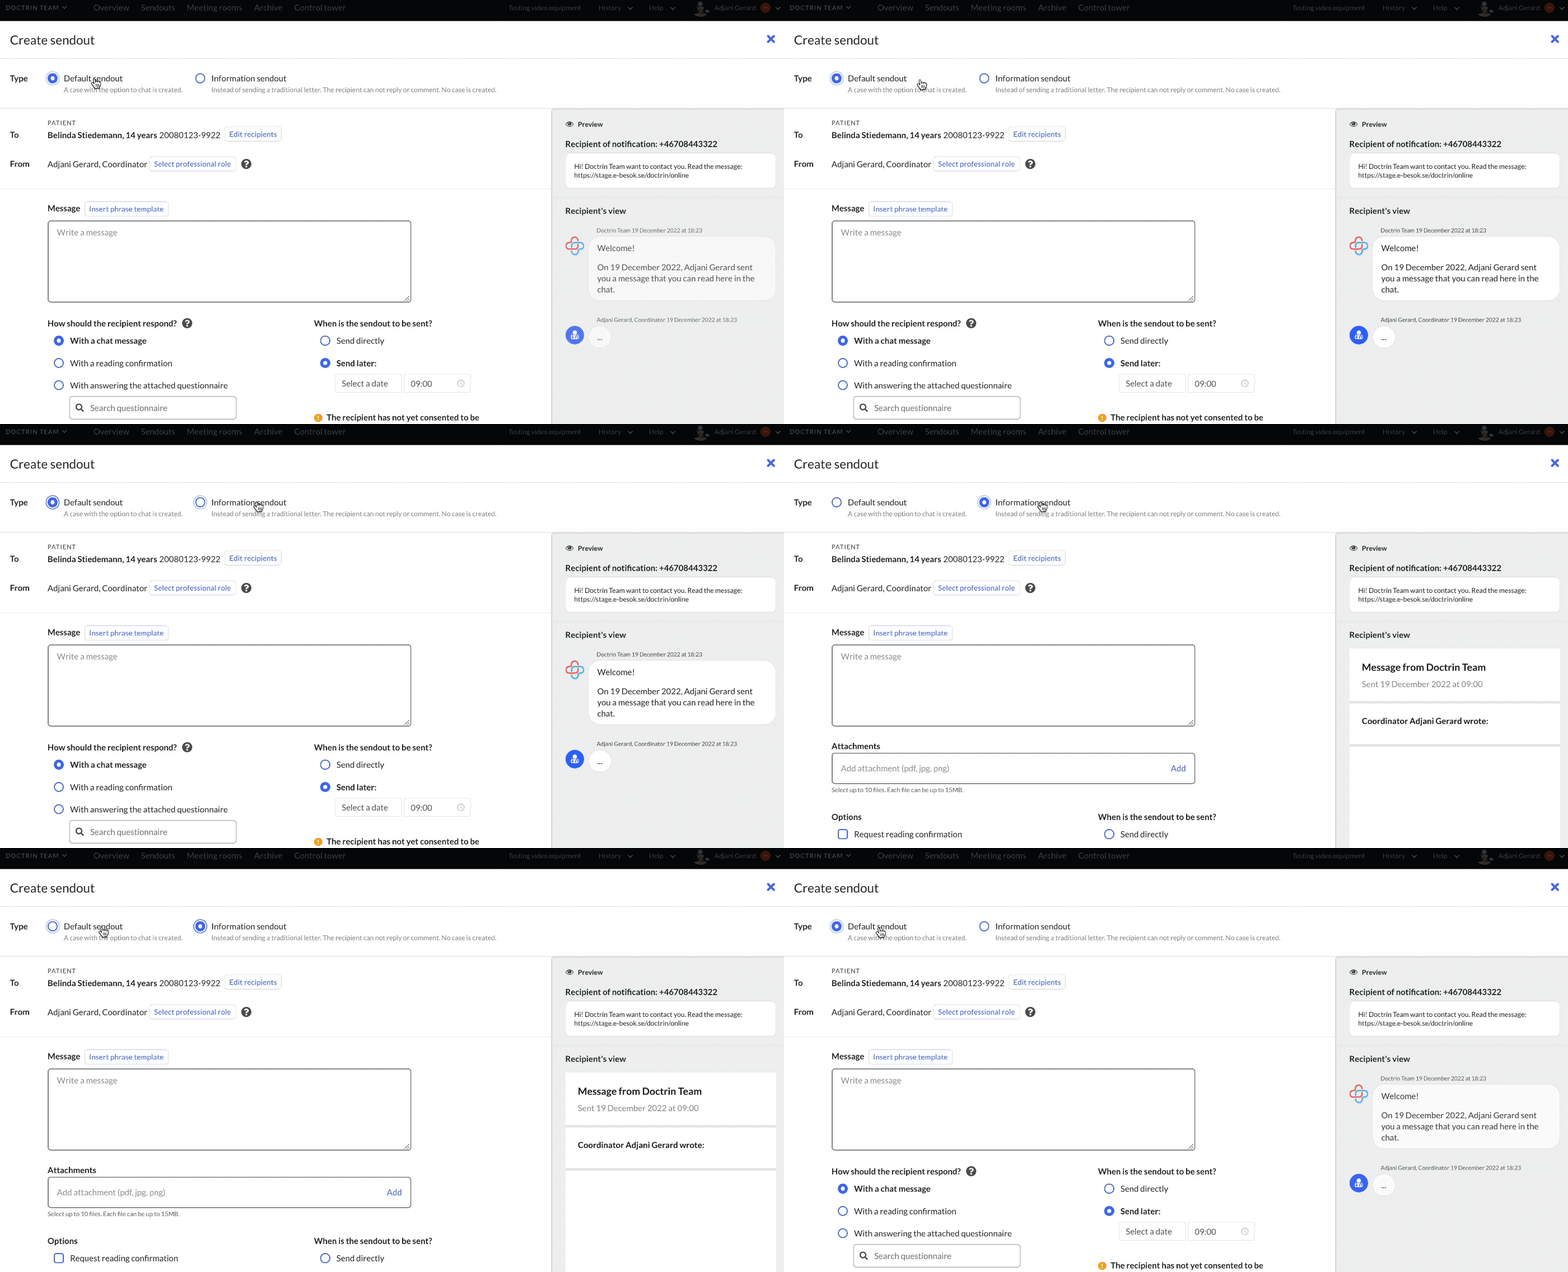
How to compose the content for a Sendout
Make sure you are in the view to create a Sendout. What are your needs? Do you want to send information that requires no response from the patient or do you want to have continuous communication?
You can switch between the different types of Sendouts even after you have started writing a message to the patient. The text remains in the message field.
- Select the type of Sendout you need to use:
| Type of Sendout | What can you do / what can a patient do |
| ———————– | ——————————————————————————————————————————————————————————————————————————————————————————————————————————————————————————————————————————————————————————————————————————————————————————————————————————————————————————————————————————————————————————————————————————————————————————————————————————————————————————————————————————————————————————————————————————————————————————————– |
| Default sendout | This type includes the possibility to chat and a case is created. You can attach a questionnaire and continue communication with the patient in the chat. |
| Information sendout | This type replaces traditional letters. Send information to a patient such as training programs, test results, X-ray results or a digital appointment letter without creating a chat or case. The patient can not reply or comment on this type. AttachmentsThis type allows attachments to be included in the Sendout. It is possible to attach files in PDF, JPG, PNG, GIF formats. 10 attachments can be attached to the same Sendout. Each attachment can be up to 15 MB. The patient can access the attachments directly after logging in. Attach a meeting roomMed den här typen är det möjligt att bifoga ett mötesrum. Genom att bifoga ett mötesrum gör du det enklare för patienten att hitta till sitt videobesök i mötesrummet. Patienten kan klicka på en knapp i utskicket och kommer direkt till mötesrummet och slipper komma ihåg anslutningskoder. With this type it is possible to attach a meeting room. By attaching a meeting room, you make it easier for the patient to find their video consultation. The patient can click a button in the sendout they receive and will be taken directly to the meeting room, without having to remember any join codes. |
1
- Select the sender – if your user is connected to multiple professions, you can choose from which profession you want the Sendout to be sent. E.g. if you send the Sendout as a “Doctor” you will receive the patient (once the patient has logged into the platform) as a “Doctor”. Write a chat message – the patient can read this once logged into the platform. The chat message will not be included in the SMS/email notification to the patient. Make the workflow smoother by using Phrase templates when you write messages. Select how the patient should answer:
Type of Sendout
How the patient can respond / response type in the list of Sendouts
Default sendout
- With a chat message – the patient responds to a Sendout by typing in the chat. After a message has been sent by a patient, the case will appear in the “New cases from Sendouts” list in the sender overview.
- With a read confirmation – the patient will see an “I have read” button next to the message from the caregiver. Once the patient has clicked on the button, the case will appear in the “New cases from Sendouts” list in the sender’s overview. Neither the sender nor the patient needs to type anything else in the chat. By filling out a questionnaire – the patient will respond to a Sendout by answering a questionnaire. Once the patient has completed all the questions, the case will appear in the “New Cases from Sendouts” list in the sender’s Overview. It is only possible to attach 1 questionnaire to a Sendout. If you want to change the questionnaire, delete it and search for a new one that matches your needs.
Information sendout
The patient can not answer.
If you request a read confirmation from the patient when you create the Sendout, they can click a button to confirm that they have read the information.
- Select when to send the Sendout – choose to send it directly or to schedule it for any given time.
Regardless of the type of Sendout, the recipient is notified (SMS or e-mail) with a link to the platform to access the information.
The date you choose is the date on which the patient receives notification by SMS or email. More about date stamps for Sendouts. - Click the button to schedule or send immediately.
Additional information
Remember to think about the length of a message as the patient will receive all the information in one message.
More information about using Sendouts for a teenager or a child.
Updated on 2024-06-03